Do you feel inspired or satisfied when you watch ink drop into a pool of water? For many, watching paint spread and disperse into water can have therapeutic effects. Marbled paper is made from just this process. In fact, most marbled paper in the United States is done with thin acrylic paints or inks dropped onto the surface of a pan of water.

Marbled papers show a vibrancy and movement that most prints don't have. This has to do with the paint's tendency to flee from the paper and sink down into the water, even as the paper catches it. Not to mention that every single piece of marbled paper is unique. This uniqueness is one of the greatest qualities of marbled paper, and possibly the reason its varied techniques have survived for centuries all around the world.
But basic marbling does not require a lot of expensive equipment or set-up. Here is a simple DIY marbling set up that you can use with your kids to express your own creativity.
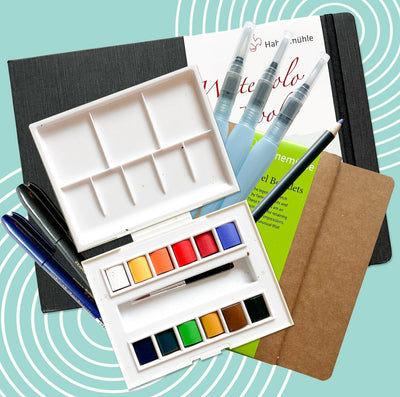
All you'll need is:
Blank paper for marbling (preferably thick and smooth like card stock)
A shallow baking pan
Foaming shave cream
Liquified Watercolors or Food Coloring
A pipette, dropper, or a brush to flick paint with
A clean stick for stirring
A straight edge, such as a washable ruler, to scrape off the extra shaving cream
- Squeeze shaving cream into the pan covering the bottom. You can use a spatula to flatten out the surface a little.
- Drop liquid colors onto the shaving cream. Remember the color of your paper determines the background.
- Use your stirring stick to drag the colors around.
- When you have a design that you like, press your paper onto the shaving cream, and then gently lift it off.
- Scrape the extra shaving cream off your paper.

Tips:
Have some fun contrasting light and dark colors.
This is a good time to liquify some gold or silver pigments, such as Pearl Ex or metallic watercolors, as accents for your marbling.
If your paper does not dry flat, you can iron it on a low setting, with a piece of cloth between the paper and the iron.
Marbling for Inspiration!
Now that you have your hand-marbled paper, here are some DIY crafts, for you to put around your house as sources of inspiration.

Lists
Use your marbled paper as the background for lists, weekly schedules or calenders.
To make a list, cut one of your marbled papers in half, to make a long thin rectangle. Cut a rectangle of white paper, so that it fits into the first with wide enough margins that you can see the marbling. Use a glue stick to past the white box onto the marbled paper. Write the title of the list at the top, and use a ruler to evenly space your list.
Calendars
This is similar to the list technique.
For a small calendar, this can be done with an a standard printer size piece of paper (8.5x11in). A larger calendar requires a fairly large piece of marbled paper. Remember that even if your pan for marbling is small, using the foam method, you can marble different sections of the same paper at different times. If you are doing this, make sure to use the same color combination both times, so that your paper has continuity.
Print out your desired calendar, and cut it to fit onto the marbled paper. Use a glue stick, and glue it down.
Notepad
Cut your marbled paper into smaller squares or rectangles, depending on what size notepad you'd like to make. Use a ruler to make lines on the back side of your marbled paper. Measuring your cuts will allow the papers of a notepad to be straight. Place your paper on top of a piece of thin cardboard or thick card stock cut to the same size. Clamp the papers in place and use PVA Glue or Rubber Cement to glue one side of the note pad. Let dry. When the glue is completely dry, and the papers are still clamped, use as fine grained sandpaper to smooth out the remaining three edges.

Notes and Envelopes
Cut your marbled paper into rectangles. Fold in half longways. Using kraft paper, fold a small envelope. You can write on the marbled front and interior of the card. Use cards to wrap gifts, small thank you notes, and send them to lunch with a loved one.
If you're thinking about more complex projects, marbled paper makes for beautiful book covers, and they are more traditionally used for the end pages of leather-bound books.
What are you using marbled paper for in your home?