Alcohol ink is an extremely flexible and impressionistic medium. Just as with any art, practice will allow you greater control over the medium and allow you to more strongly define your paintings and patterns, but what you choose to do with theses inks, whether it’s create flowing abstract art or stained-glass-like images, is completely up to you and your own style.

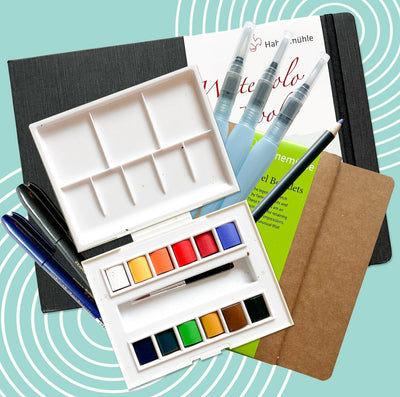
Different Applicators of Alcohol Inks
- Brushes
The free-flowing quality of alcohol inks allows them to work well with many type of brushes, depending on the textures that you want to achieve. Coarse brushes will add in more texture as the ink dries, giving strong outlines. Softer brushes, on the other hand, will allow more blending, and easier detail painting. It’s best to not use your nicest brushes because the alcohol ink is liable to dye the bristles.
- Markers
Remember that alcohol inks are essentially the same as the dyes that are inside of most markers. You can use markers to have more control when working with fine details in the top layers of your alcohol ink painting. You can use black markers to draw outlines on top of alcohol ink backgrounds, often allowing a stained-glass effect, or just to clean up the look of an alcohol ink painting with fine details.
- Droppers
Most bottles of alcohol ink come attached to their own droppers, but it can be helpful to have some disposable droppers on hand for color mixing and experimentation. Dropping colors onto a surface or into another color is one of primary techniques of abstract painting with alcohol inks.
- Felt Stamps and Brushes
Felt brushes look like stamps that are covered in a layer of absorbent cloth. These stamps often come with replaceable felt pieces which can be switched out depending on color profile and overall messiness. Felt brushes are frequently used to apply alcohol inks to a surface and to and blend alcohol inks to achieve a variety of patterns.
- Spray Bottles
By putting your alcohol inks in a small spray bottle, you can spray colors directly onto your surface. This is great for when your surface is covered in blending solution, or when you want to spray a color into a still wet background to create more texture.
- Art Sponges
There are many type of sponges used in the art community, including real and synthetic sea sponges. Using a sponge to apply or blend colors can create interesting and varied texture effects that accent alcohol inks’ free-form aesthetic.
- Magic Erasers
Alcohol ink artists have also been known to experiment with magic erasers (as in the household cleaning supplies) to work as both a sponge and a brush at the same time. Magic erasers can hold a lot rubbing alcohol and ink at the same time making them versatile tools for painting. These can even replace the more expensive felt stamps and brushes for ink application
Texture Play
Some of the main textures of alcohol ink painting come from the way they dry. As they dry, alcohol inks create a strong, outline right around the edge of a pool of ink. Artists have developed texture techniques to control these edges, such as controlled drying using a hairdryer, flicks of ink off a paintbrush, and rolling plastic straws throughout a general wash to make waves.
Using Rubbing Alcohol
Since alcohol inks use clear alcohol in its dye mixture, it is possible to use rubbing alcohol as a thinner and medium when painting with alcohol inks. If you decide to use rubbing alcohol, make sure that it is 91% or higher so that you can get the most consistent effects. There are three primary uses for rubbing alcohol when painting with alcohol inks:
- To reactivate dried alcohol inks. Just like you would rewet a watercolor with water, you can rewet alcohol inks with rubbing alcohol. Depending on how well your surface accepts dye, you may not be able to fully remove the color where the ink once was, but it will make it easier to get your inks moving again.
- To thin out alcohol inks. Alcohol inks are generally very strong dyes, meaning that if you want to create lighter or more transparent washes, you will need to thin out the dye with rubbing alcohol. While many alcohol ink artists will drop the dye directly onto their surface, it can be a good idea to keep a mixing palette nearby with rubbing alcohol on it to thin out colors.
- To create texture. Rubbing alcohol can be dropped directly onto your painting, sprayed into a blown flower, or misted across the surface of your painting using a spray bottle to create texture. This will give your painting, controlled inconsistency in texture, such as a dappled or bubbled look.
Painting Technique 1: Background with Layering

Begin by applying Blending Solution over the entirety of your surface. This will allow the alcohol inks to flow easily around the surface and mix into each other without harsh outlines upon drying.
Add in your alcohol inks, using colors in the general regions that you want them. Keep in mind that these dyes will most likely mix with each other, creating ombre effects, as well as secondary and tertiary colors. You can pick up and move your surface to blend your inks in a more natural way. Or, use a brush, sponge, or felt stamp to blend the different colors.
Let dry completely, either by air or using the heat from a hairdryer on low setting.
Then, either using brushes or markers, paint or draw outlines in the foreground. Use the upper layers to create detail and dimension.
Painting Technique 2: Blown Flowers

Blown flowers refer to the technique of using alcohol ink on a non-absorbent surface, such as a ceramic tile, aluminum canvas, or yupo paper, to create free-form flower petal shapes with blown air.
Many professionals will use an airbrush to blow out the ink, but it is possible to do this with compressed air (such as keyboard cleaner) or even by manually blowing into a straw.
Begin by dropping ink on your paper and using an air blowing device to push the ink until it takes on a thin and delicate look. Continue developing your flower by adding more ink at the base of where you begin. This can be the same color or a layer of a different color. Blow this color out in the same way, using the direction of the air to manipulate the flower’s shape. You can use a layer of rubbing alcohol to blow into your other layers to give the petals translucency and dimension.
You can keep these flowers abstract or use brushes and painting techniques to give them a stem.


