All About Soft Pastels and Charcoal

Used by artists since the Renaissance, pastels consist of pure powdered pigment and a binder, then rolled or pressed into sticks. Originating from the late Latin word pastellus, meaning paste, the French word for pastel first appeared in 1662. Because the original pigment had a tendency to be dark, it was mixed with different quantities of chalk in order to produce a fuller range in color.

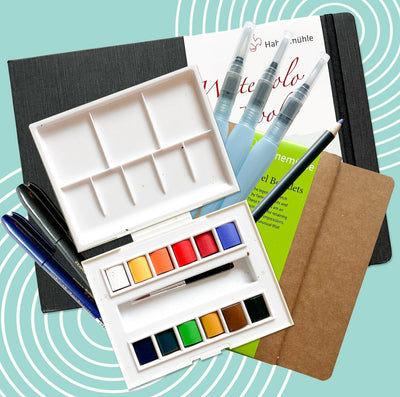
March's Smart Art Box not only contained a beautiful set of Soft Pastels, but also a complete kit of charcoals, paper, tape, erasers, and a paint pen to create beautiful artwork that has all of the softness and charm that makes this medium so special.
Tips and Tricks
- Work from left to right if you are right-handed or vice versa if left-handed. This will prevent you from smudging the pastel while working.
- Use a piece of scratch paper to cover your work while you work across the page. A piece of wax paper works great too!
- Your fingers are the best tools! Use them to blend both large or small areas. Don’t forget to keep an eye on them and wipe them clean if you notice they are interfering with your blending.
- Leave some of the pastel marks visible rather than blending them completely. This will add texture and create spontaneous effects!
- Use the side of the pastel blocks to lay down the basic background. Their wide surface will make it much easier to fill the larger spaces.
- Working with pastels and charcoal is messy business. Make sure you are ready to get your hands dirty and have some cloth or napkins at the ready!
- Practice using the various sizes of charcoal. Use the blocks to cover a wider surface area and the pencils for more detailed work. Also, be sure to test the densities of the various materials.
- Always start by drawing simple shapes to outline your drawing. Once these are in place and you are happy with your proportions, you can begin to add details and erase any unwanted original markings.
- Use thick and thin lines to vary your piece and add dimension as well as character. Using the same pressure throughout your drawing can make it look cartoonish, varying the lines will give your drawing more life.