Calligraphy is the art of beautiful handwriting. While many Calligraphy pros enhance their work with watercolor backgrounds, brush-pen flowers, and an overall eye for design, the basis of great calligraphy skills is learning to write well in a particular alphabet.
Perusing the calligraphy tags on social media, you will probably see calligraphy masters who can switch their hands from piece to piece. In one post they might be writing in Copperplate, and in another Roundhand. They might then switch from Spencerian to Italic. To start with, however, you'll need to pick a hand—just one!—that you would like to master. For a novice calligrapher practicing in too many hands at once can cause sloppy work and confused techniques. Once you are proficient in your first hand, then you can move on to another one. As you learn more and more, they will become easier to learn.
1. Pick a Style

The word calligraphy doesn't just indicate copperplate nibs or a quill pen anymore. While it is still traditional to learn older manuscript techniques for calligraphy, there are many artists who are masters of modern calligraphy hands. You have probably noticed brush-pen calligraphy popping up everywhere. The brush-pen style offers a very pretty balance of casual and refined lettering.
So your first step is to pick what style you might want to begin with: brush-pen, broad-pen, pointed-pen; modern or historical?
2. Pick a Hand

Narrow down the style that you've already picked by picking a hand. This should give you a look that you enjoy, and that works well with the sort of calligraphic pieces you want to create.
Some historical hands that use a broad pen are Uncial, Gothic, Roundhand, and Italic. Pointed-pen calligraphic hands include Copperplate, Spencerian, and Cursive Script.
Brush-pen calligraphy is a more contemporary style, currently being expanded upon by numerous individuals artists. If you know of a Brush-pen calligrapher whose work you enjoy, chances are they might have a lettering template that you can follow or a practice sheet for copying their hand. Because of Brush-pen calligraphy's experimental form, you can even convert your own handwriting into beautiful Brush-pen art, by making just a few technical adjustments.
3. Find the proper tools for your hand

Dip pens come in two main forms: Straight and Oblique. With a straight pen, you would attach the nib directly to the end of the pen. With an Oblique pen, the nib is attached to a flange that comes off the side of the pen shaft. The oblique pen allows for easier automatic angling than the straight pen, and it is often used for Copperplate calligraphy. Unless you have your heart set on working with a dip pen, it is not necessary to add this extra difficulty to your practice.
Cartridge based pens can be found for both Pointed-pen and Broad-edge calligraphy. If you use a fountain pen for pointed-pen calligraphy, make sure to find one with a flexible nib. Broad edge calligraphy can be done with broad nib fountain pens or parallel pens. For Brush-pen calligraphy, you can use a water-pen. A water-pen is a brush attached to a squeezable water cartridge. It is also easy to find ink markers with Brush-pen tips.
4. Source the proper practice paper

Many calligraphers get their best creative ideas from a beautiful piece of paper. However, many papers are not user friendly for novice calligraphers. Papers with a coarse grain, including many handmade papers, might cause ink to feather. Paper that is too textured may catch the tip of your pen nib or cause your writing to have skips in it. Start with a simple paper that you don't mind messing up, and test it with a small mark to make sure it does not feather.
It can help to have translucent paper or thin tracing paper, when you are using a paper guide underneath to track the angle of your writing.
5. Find instructions on the hand you are using
There are many helpful manuals to demystify calligraphic hands. These include step by step instructions on proper pressure, proper angles, as well as the ways that letters are shaped. Some even include practice sheets that you can trace over. Finding good instruction for your hand will make your practice easier and quicker.
6. Practice! Practice! Practice!
Part of developing a calligraphic hand is muscle memory. In order to gain this muscle memory you must practice. Slow, concentrated deliberation will give you the best calligraphic results. This will mean you will need to write the same letter or combination of letters over and over again. Remember to be patient with yourself and reward your own progress.
7. Experiment with different Flourishes and Ornaments

Each style and hand has its own flourishes and style of illustrative ornaments to jazz up the writing. Some people are able to think spatially about how they want their flourishes to fill up the space, and others need to practice and memorize these as well. Once you are consistently writing the bare letters well, practice a few flourishes to give your work that extra boost of beauty.
8. Experiment with Different Inks and Paints
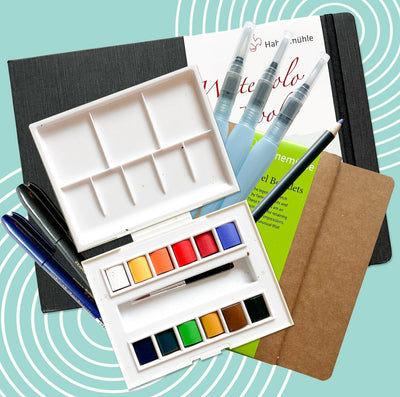
If you have practiced enough that you are writing consistently with your cartridge pen, shifting to a dip pen can allow you more artistic freedom. The dip pen allows you to control the color and consistency of the ink you use. With a dip pen you can mix inks, use metallic pigments, and use gouache or watercolor in your pen. This will allow you to make ombre effects, or change colors mid sentence.
9. Practice with short sentences

Practice putting all these calligraphic techniques together by writing out single sentences. If you attempt a long piece soon, you might make many mistakes, thus ruining the piece and not learning from those mistakes. With single short sentences that take you under 10 minutes to write, you can build up your skills much more quickly, learning as you go.
10. Write a long calligraphic piece
When you are ready, conceptualize a longer project. Research a quotation that you want to calligraph. Maybe you'll want to write your calligraphy on top of a watercolor wash. Build your piece with all the components that you have been practicing, including colors and flourishes. Now, you are writing your calligraphy like a pro!